Creating Tabs with HTML, CSS & jQuery
- 6 min read
In this tutorial, we’re going to look at how to create tabs in HTML, CSS and jQuery. If you get stuck, don’t hesitate to ask me a question.
Tabs are a great way of grouping lots of content into a very small space. Think of tabs like the TARDIS…bigger on the inside. They can be incredibly handy when you have a lot of content that would simply fill up your page with too much information in one go.
You might also like: Creating an Accordion with HTML, CSS & jQuery.
Table of Contents
- Skip to the HTML
- Skip to the CSS
- Skip to the jQuery
1.) The HTML
Completed Code (HTML)
I go into detail on the specifics of the HTML layout below.
<div class="tabs">
<ul class="tab-links">
<li class="active"><a href="#tab1">Tab #1</a></li>
<li><a href="#tab2">Tab #2</a></li>
<li><a href="#tab3">Tab #3</a></li>
<li><a href="#tab4">Tab #4</a></li>
</ul>
<div class="tab-content">
<div id="tab1" class="tab active">
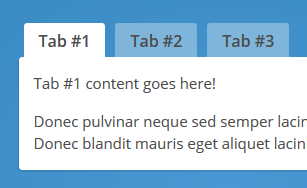
<p>Tab #1 content goes here!</p>
<p>Donec pulvinar neque sed semper lacinia. Curabitur lacinia ullamcorper nibh; quis imperdiet velit eleifend ac. Donec blandit mauris eget aliquet lacinia! Donec pulvinar massa interdum risus ornare mollis.</p>
</div>
<div id="tab2" class="tab">
<p>Tab #2 content goes here!</p>
<p>Donec pulvinar neque sed semper lacinia. Curabitur lacinia ullamcorper nibh; quis imperdiet velit eleifend ac. Donec blandit mauris eget aliquet lacinia! Donec pulvinar massa interdum risus ornare mollis. In hac habitasse platea dictumst. Ut euismod tempus hendrerit. Morbi ut adipiscing nisi. Etiam rutrum sodales gravida! Aliquam tellus orci, iaculis vel.</p>
</div>
<div id="tab3" class="tab">
<p>Tab #3 content goes here!</p>
<p>Donec pulvinar neque sed semper lacinia. Curabitur lacinia ullamcorper nibh; quis imperdiet velit eleifend ac. Donec blandit mauris eget aliquet lacinia! Donec pulvinar massa interdum ri.</p>
</div>
<div id="tab4" class="tab">
<p>Tab #4 content goes here!</p>
<p>Donec pulvinar neque sed semper lacinia. Curabitur lacinia ullamcorper nibh; quis imperdiet velit eleifend ac. Donec blandit mauris eget aliquet lacinia! Donec pulvinar massa interdum risus ornare mollis. In hac habitasse platea dictumst. Ut euismod tempus hendrerit. Morbi ut adipiscing nisi. Etiam rutrum sodales gravida! Aliquam tellus orci, iaculis vel.</p>
</div>
</div>
</div>Tab Links
Starting off there’s a div with class="tabs". Inside there’s an unordered list, (or an ordered one if you like, it makes no real difference), with class="tab-links". Inside the list items there are anchor links. The first list item is marked as class="active". This indicates where to start the tabs.
Note: When the CSS is all done, the tab link parent with class="active" will be the highlighted one on page load.
<div class="tabs">
	<ul class="tab-links">
		<li class="active"><a href="#tab1">Tab #1</a></li>
		<li><a href="#tab2">Tab #2</a></li>
		<li><a href="#tab3">Tab #3</a></li>
		<li><a href="#tab4">Tab #4</a></li>
	</ul>
</div>
Tab Content
There’s a div with class="tab-content". Inside of that, we have 4 divs, each with class="tab", (this number corresponds to how many tab links there are). The currently visible tab will also need an active class, e.g. class="tab active".
<div class="tab-content">
	<div id="tab1" class="tab active">
		<p>Tab #1 content goes here!</p>
		<p>Donec pulvinar neque sed semper lacinia. Curabitur lacinia ullamcorper nibh; quis imperdiet velit eleifend ac. Donec blandit mauris eget aliquet lacinia! Donec pulvinar massa interdum risus ornare mollis.</p>
	</div>

	<div id="tab2" class="tab">
		<p>Tab #2 content goes here!</p>
		<p>Donec pulvinar neque sed semper lacinia. Curabitur lacinia ullamcorper nibh; quis imperdiet velit eleifend ac. Donec blandit mauris eget aliquet lacinia! Donec pulvinar massa interdum risus ornare mollis. In hac habitasse platea dictumst. Ut euismod tempus hendrerit. Morbi ut adipiscing nisi. Etiam rutrum sodales gravida! Aliquam tellus orci, iaculis vel.</p>
	</div>

	<div id="tab3" class="tab">
		<p>Tab #3 content goes here!</p>
		<p>Donec pulvinar neque sed semper lacinia. Curabitur lacinia ullamcorper nibh; quis imperdiet velit eleifend ac. Donec blandit mauris eget aliquet lacinia! Donec pulvinar massa interdum ri.</p>
	</div>

	<div id="tab4" class="tab">
		<p>Tab #4 content goes here!</p>
		<p>Donec pulvinar neque sed semper lacinia. Curabitur lacinia ullamcorper nibh; quis imperdiet velit eleifend ac. Donec blandit mauris eget aliquet lacinia! Donec pulvinar massa interdum risus ornare mollis. In hac habitasse platea dictumst. Ut euismod tempus hendrerit. Morbi ut adipiscing nisi. Etiam rutrum sodales gravida! Aliquam tellus orci, iaculis vel.</p>
	</div>
</div>
2 The CSS
I’m going to keep it simple with basic CSS (as opposed to an SCSS pre-processor like Sass, Less or Stylus). The bulk of this tutorial is aimed at beginners, so I’m taking that into account.
Completed Code (CSS)
I go into detail on the specifics of the CSS styling below.
/*----- Tabs -----*/
.tabs {
	width:100%;
	display:inline-block;
}

/*----- Tab Links -----*/
/* Clearfix */
	.tab-links:after {
	display:block;
	clear:both;
	content:'';
}

.tab-links li {
	margin:0px 5px;
	float:left;
	list-style:none;
}

.tab-links a {
	padding:9px 15px;
	display:inline-block;
	border-radius:3px 3px 0px 0px;
	background:#7FB5DA;
	font-size:16px;
	font-weight:600;
	color:#4c4c4c;
	transition:all linear 0.15s;
}

.tab-links a:hover {
	background:#a7cce5;
	text-decoration:none;
}

li.active a, li.active a:hover {
	background:#fff;
	color:#4c4c4c;
}

/*----- Content of Tabs -----*/
.tab-content {
	padding:15px;
	border-radius:3px;
	box-shadow:-1px 1px 1px rgba(0,0,0,0.15);
	background:#fff;
}

.tab {
	display:none;
}

.tab.active {
	display:block;
}
Tabs Container
The display:inline-block; adds a type of clearfix while also making it more ‘stable’ than if we used display:block;.
The reason we use a clearfix above yet not here is as follows: display:inline-block; sometimes adds 7px-ish of margin below the affected element with no way of removing it. Sometimes using a minus bottom margin works, but it depends heavily on how your HTML is structured. In this instance it’s fine.
/*----- Tabs -----*/
.tabs {
	width:100%;
	display:inline-block;
}
Tab Link Wrappers
We declare no list-style to stop it appearing as a default list. Then the margin so the links are spaced evenly apart, (using margin:0px 5px; is the same as using margin:0px 5px 0px 5px;).
.tab-links li {
	margin:0px 5px;
	float:left;
	list-style:none;
}
Tab Links
These are all basic styles which you should understand if you’re attempting this tutorial. If you don’t, please find the proper values and the definitions for each on the CSS-Tricks Almanac.
You may be wondering why I’ve used transition:all linear 0.15s; instead of transition:background linear 0.15s;. The reason is simple, in my experience, you have to think ahead. If you don’t then nasty, (sometimes hard to fix), bugs pop-up seemingly out of nowhere. By using background instead of all, we’d be limiting what can be transitioned on the :hover effect. Since this is a tutorial, many of you may want to change the text colour on hover. By using all instead of background that makes it possible.
.tab-links a {
	padding:9px 15px;
	display:inline-block;
	border-radius:3px 3px 0px 0px;
	background:#7FB5DA;
	font-size:16px;
	font-weight:600;
	color:#4c4c4c;
	transition:all linear 0.15s;
}

.tab-links a:hover {
	background:#a7cce5;
	text-decoration:none;
}

li.active a, li.active a:hover {
	background:#fff;
	color:#4c4c4c;
}
Tab Content
This is the background of the tab content section.
/*----- Content of Tabs -----*/
.tab-content {
	padding:15px;
	border-radius:3px;
	box-shadow:-1px 1px 1px rgba(0,0,0,0.15);
	background:#fff;
}
Non-Active/Active Tab Content
We set all tabs to display:none; which hides them. Then we set the active tab to display:block; so only that one will show up. It’s a simple case of using CSS the way it was designed, which was to cascade down. Hence the name, Cascading Stylesheets.
.tab {
	display:none;
}

.tab.active {
	display:block;
}
You might also like: Creating a Dropdown Menu with HTML & CSS
3 The jQuery
Below you can see the completed jQuery code. Keep scrolling for a good explanation of how it all works and what it all means.
Let me clarify something before we start: Everyone has their own way of coding, with jQuery this is mine. Writing it out like this makes it easier for a beginner to grasp, it’s also efficient.
Completed Code (jQuery)
jQuery(document).ready(function() {
	jQuery('.tabs .tab-links a').on('click', function(e) {
		var currentAttrValue = jQuery(this).attr('href');

		// Show/Hide Tabs
		jQuery('.tabs ' + currentAttrValue).show().siblings().hide();

		// Change/remove current tab to active
		jQuery(this).parent('li').addClass('active').siblings().removeClass('active');

		e.preventDefault();
	});
});
Basic Setup
You have to start by checking if the document is ready, for this we use:
jQuery(document).ready(function() {
	// Code Here
});
Next is to check if the user has clicked on a tab, to do that we simply reference every link that happens to be a tab link with .tab-links a.
jQuery('.tab-links a').on('click', function(e) {
	// More Code Here
});
Dynamic Variable
Next, we create a variable called currentAttrValue, (current attribute value), which grabs the href="" of the clicked anchor link.
var currentAttrValue = jQuery(this).attr('href');Match Anchor Link to Div #ID
We need a way of matching up the .tab-link anchors with .tab sections. We start off by referring to the entire tabs component, with .tabs, then we say “If .tabs has a child with an #id that then matches a .tab-link href="", then they should be linked up”.
Then we say “Show the element with the referenced #id, such as #tab2, then find the other tabs, which are siblings of #tab2, and hide them”.
jQuery('.tabs ' + currentAttrValue).show().siblings().hide();Giving The Tab Link an Active State
Changing the active state of the tab link is relatively the same as showing/hiding the tab content.
First, we look for jQuery(this), which is the current anchor link being clicked. Then we find it’s parent list item with .parent('li') tag. After that, we give that parent list item a class of .active by using .addClass('active'). Lastly, we find all siblings of that parent list item and remove, if any, classes of .active by using .siblings().removeClass('active').
jQuery(this).parent('li').addClass('active').siblings().removeClass('active');Prevent Default Anchor Link Behaviour
You may notice that when you click an anchor link with an #id specified instead of an actual URL, it tends to add the #id into the address bar. E.G. http://sebkay.com becomes http://sebkay.com/#id. This can be a massive pain-point for users when trying to click the back button.
To get past that UX problem we use:
e.preventDefault();This handy little function stops the default action of the clicked element from happening.
Remember when we put that function(e)at the start of our click event? Well, this is where that ties in.
Extra Credit: jQuery Animations
You may not like the way it just jumps to the new tab content without any nice animation of any kind, well here’s some extra credit.
To apply these changes simply replace the below snippet with the other code snippets that follow.
Default
// Show/Hide Tabs
jQuery('.tabs ' + currentAttrValue).show().siblings().hide();
Fade
// Show/Hide Tabs
jQuery('.tabs ' + currentAttrValue).fadeIn(400).siblings().hide();
Slide 1
// Show/Hide Tabs
jQuery('.tabs ' + currentAttrValue).siblings().slideUp(400);
jQuery('.tabs ' + currentAttrValue).delay(400).slideDown(400);
Slide 2
// Show/Hide Tabs
jQuery('.tabs ' + currentAttrValue).slideDown(400).siblings().slideUp(400);
Conclusion
If you’re reading this conclusion, (most people, including me, tend to leave after they’ve got the code they were after), then please leave a comment below with any problems or bugs regarding this tutorial. I’m writing this to help people learn and become the best they can be.
You might also like: 21 Must-Have Front End Development Tools.
Seb Kay
June 3, 2014 at 10:34 am
Elina I’ve had a look at your code and the biggest problem is the styling. I believe that’s what is causing the bugs. I would recommend minimising your code to parts that are only essential to getting it working and go from there.
If you’re still having problems I can schedule a few hours off tonight and re-build it in jsFiddle for you just to make sure there are no problems. Let me know how you get on 🙂
Seb Kay
June 3, 2014 at 10:23 am
Hi Samrat,
I don’t understand your question. If you post a http://jsfiddle.net for me to look at I can help you sort out your code.
samrat
June 3, 2014 at 6:39 am
validation textbox in first tab should only selected button from Second tab in jquery
please answer me.
Seb Kay
June 2, 2014 at 8:02 pm
Hi Elina,
Sorry for the delay. I will take a look first thing in the morning 🙂
Elina
June 2, 2014 at 5:39 pm
Hip!
Have You got any ideas with my slideshow problem?
Dhruv
June 2, 2014 at 1:37 pm
Again, thanks a lot! 😀
Seb Kay
June 2, 2014 at 11:13 am
Just a simple:
.tab-links {

    margin-bottom:0px;

}
Should do it 🙂
Dhruv
June 2, 2014 at 11:07 am
However, there’s a little space/margin between the content box and those tabs. So, they look detached.
How do I remove that?
Dhruv
June 2, 2014 at 11:01 am
It works now!
I wasn’t accessing the JQuery library for functions to execute.
So, instead of downloading it I included the link to the library hosted by google. 😀
Here’s the tutorial link : http://www.w3schools.com/jquery/jquery_install.asp
Thanks for helping man, this post is the easiest way to understand what really is happening in the code!
Seb Kay
June 2, 2014 at 10:48 am
It could be a few things. Most likely is that jQuery isn’t being included correctly. It should be version 1.10.1 for this tutorial. Also, I noticed that in the HTML the active tab was marked as
class="tab.active"when it needs to be a space and not a period for multiple classes. e.g.class="tab active".Let me know if this helps!
Dhruv
June 2, 2014 at 10:46 am
*but not on my localserver
Dhruv
June 2, 2014 at 10:45 am
It works on JSFiddle, but on my localserver. Why is it so?
Seb Kay
June 2, 2014 at 10:37 am
Hey Dhruv,
The problem was that there was no space after the word ‘tabs’. e.g.
'.tabs ' + currentAttrValue.Here is the updated code if you need it: http://jsfiddle.net/a984D/3/
Dhruv
June 2, 2014 at 10:25 am
Hey man, I’m also facing similar issues like content doesnt change according to the respective tab.
Any help would be really appreciated.
Here’s the JSFiddle link : http://jsfiddle.net/dhruvseth93/a984D/
Thanks in advance.
Seb Kay
May 30, 2014 at 1:33 pm
Hi Joshua, thanks for the idea. I’m going to go with your suggestion of a plugin for code comments. Thanks again! 🙂
joshua
May 30, 2014 at 7:18 am
hey mate please delete my comments, im gathering its a wordpress blog cause i cant enter HTML code to help out the other guy, maybe you should look at using a plugin that allows code snippets…just like stack overflow.
Thanks
Seb Kay
May 30, 2014 at 1:40 am
Elina and Emmanuel,
I’ll look into both your questions and get back to you 🙂
Emmanuel
May 29, 2014 at 9:43 pm
Hi Seb,
Thanks for the tutorial, it’s Awesome!
I’m wondering if it’s able to keep all the tabs hidden when Open/Refreshing the page, instead of the default active tab opened at first.
Thanks alot!!
Elina
May 28, 2014 at 4:00 am
Is here any help: http://css-tricks.com/forums/topic/slideshow-not-working-in-toggle-tabs/
Elina
May 27, 2014 at 6:44 pm
Hi!
Slideshow demo is now here: http://jsfiddle.net/Lnaq4/11/
Seb Kay
May 27, 2014 at 5:17 pm
I feel your pain. More than once have I had a PHP bug break my design becuase unclosed tags or something.
Glad to know you figured it out 🙂
Jay
May 27, 2014 at 5:10 pm
Aaaand the solution is found.
I’d mistakingly gotten rid of my final “echo “”; ” at the end of my PHP print. Since it believed the table was neverending, the content WAS swapping back, but it was so far off screen it was unviewable.
Sometimes, human error can be a real pain.
Now that its solved… Thanks for the brilliant quick tool! Never been the sharpest at using javascript so it helps me alot! (More of a HTML, CSS and PHP guy).
Jay
May 27, 2014 at 5:06 pm
Hey again,
I’ve just been fiddling around removing some content etc from the tabbed boxes…. for some reason the print of my mysql data in tab 1 is causing a bug, so its some kind of error on my part.
I’ll get back to you when I know exactly what it was, just for peace of mind’s sake!
Jay
May 27, 2014 at 4:47 pm
Heya Seb,
I have absolutely no other JS files on my site at all, so it isn’t a file conflict. Reckon any of the php parts shown could be breaking it?
Seb Kay
May 27, 2014 at 4:43 pm
Hey Jay,
The reason jsFiddle wouldn’t work is because you need to select the version of jQuery in the left sidebar. For this tutorial I used 1.10.1.
Other than that it seems to be working fine on jsFiddle (example http://jsfiddle.net/pQjs9/1/). You may have a conflicting file that’s interupting the tabs. Can you check for me? It may be easiest if you eliminate certain things on the page (like other included JS files) to find what’s causing it.
Let me know how you get on.
Jay
May 27, 2014 at 3:17 pm
Hey Seb,
Awesome tutorial, and it was working fine for me but suddenly, when I change to tab 2, it won’t allow me to swap back to tab 1?
jsfiddle: http://jsfiddle.net/pQjs9/
and just a note, on jsfiddle it doesn’t even allow me to swap from one tab to another…. weird.
Elina
May 27, 2014 at 2:55 am
Ok, I’ll but the code.
But I think problem is something like this: http://www.sitepoint.com/forums/showthread.php?809931-Multiple-MooTools-Slideshows-in-Spry-tabs
Zac
May 26, 2014 at 12:37 pm
Hey Seb,
Thanks for the coding and explanation. I have met an issue where I did not get jquery to work and solved it by visiting this link. http://stackoverflow.com/questions/14106864/linking-jquery-in-html
Well ya, i’m a amateur in web development and you got me going which means you have a solid write up!
Cheersss..!
Seb Kay
May 26, 2014 at 11:00 am
Hi Elina, I think this is most likely a CSS bug. If you post the code on http://jsfiddle.net I’ll be happy to take a look for you.
Elina
May 25, 2014 at 12:09 pm
Hi!
Tabs works great! Thanks!
I would like to but slideshows with thumbnails to each tabs (3). First tab works quite ok, but other doesn’t work. Large picture is first small and then expand. And thumbnails aren’t inline, they are below each other. And when I go back to first, it’s small too.
I use Camera plugin for slideshow (http://www.pixedelic.com/plugins/camera/). And I’m not good with javascript.
Have You any ideas how to get slideshow to work?
Testpage:
Seb Kay
May 17, 2014 at 6:15 pm
Hi Abdul, can you give me an example on http://jsfiddle.net and I’ll do my best to fix it for you 🙂
abdul
May 17, 2014 at 5:02 pm
I copied and tested your code but the active tab and the div content is separating apart. Any idea why this happens.
Seb Kay
May 15, 2014 at 6:06 pm
OK, try loding it from google CDN: https://ajax.googleapis.com/ajax/libs/jquery/1.10.1/jquery.min.js
Shivani
May 15, 2014 at 11:56 am
Yes i am using script tags and entering this URL in the src attribute of script tag.
Shivani
May 15, 2014 at 11:55 am
Yes in
Seb Kay
May 15, 2014 at 11:37 am
What code are you using to include the jquery, as in the script tags?
Shivani
May 15, 2014 at 5:36 am
I have included this link in the src attribute of script tag —- https://code.jquery.com/jquery-1.10.1.min.js
Please revert back ASAP.
Thanks
Shivani S.
Shivani
May 15, 2014 at 4:10 am
No Success 🙁
Please help. Can you please send the link to jquery file that has to be included?
Thanks
Shivani S.
Seb Kay
May 14, 2014 at 7:18 pm
Hi Shivani, sorry for the late reply. The problem is the jquery you’re including. It requires jquery 1.10.1 – Here is the working example: http://jsfiddle.net/64Qsa/3/
Shivani
May 14, 2014 at 4:18 pm
Seb…
It is really urgent for me.
Please reply ASAP.
Thanks
Shivani S.
Shivani
May 14, 2014 at 12:39 pm
Hello Seb
Need your help. I am trying to use your code, but it is not working.
I am including these files in the
Here is my code:
http://jsfiddle.net/s_sachdeva/64Qsa/
I don’t have any idea, whats going wrong. Please help.
Thanks
Shivani S.
kyle
May 12, 2014 at 11:57 am
OK – So I’m an idiot sometimes 😛
The problem with ajax and the tab code is that when you completely replace the entire tab html you lose the onclick binding to the tab links. All that is required to restore the onclick handling is to include the function from the document ready code in the result handler of your ajax call after you have loaded the new tab content. If you are using the jquery post function for ajax it should look something like this:
var posting = $.post( url, {"post_var1":data,"post_var2":data2}, function(ajaxresult){

                  // load the result html into the  container div

		$("#tabContainer").html(ajaxresult);
// Now bind the onclick to the new tab set
$('.tabs .tab-links a').on('click', function(e) {
var currentAttrValue = $(this).attr('href');
// Show/Hide Tabs
$('.tabs ' + currentAttrValue).show().siblings().hide();
// Change/remove current tab to active
$(this).parent('li').addClass('active').siblings().removeClass('active');
e.preventDefault();
});
});
If you don’t have the tabs in the static html and are only loading your tab set via ajax, you don’t need the document ready code. It doesn’t hurt anything if you include it though. I hope that helps someone and it should serve as an example of why you shouldn’t code for 2 days without sleep, even if you do have a looming deadline 😉
That’s a pretty common ajax situation and I should have caught it right away…
Seferex
May 9, 2014 at 4:25 am
Looking on the web i’ve found exactly what i need:
This artichle is pretty interesting, but i don’t know how to integrate that code with yours… So using the same HTML and the same CSS, can you tell us a java code that allow us to go in different tabs with external links?
As the article says, it would very usefull if every tab change his url on the navigation bar (in that way it should be possible to make simple href links pointing on the page)
In my case i have a banner that link in different tabs evert time (the banner is in another page). I hope you can help me out with this cause its days that i’m trying to fix this
Seferex
May 9, 2014 at 1:06 am
Hello, thanks for the code.
As maramau79 asked i need to change the “tabs” pages with an external link. Can you please tell us how to do it?
Thank you very much
PI_newbie
May 7, 2014 at 9:18 am
Sorry i give up 😀
PI_newbie
May 7, 2014 at 9:17 am
sorry, I mean: //Vorschau
PI_newbie
May 7, 2014 at 9:16 am
Hi,
I got it on my own now 🙂 I changed: $(this).parent(‘li’).addClass(‘active’).siblings().removeClass(‘active’);
to: $(currentAttrValue + ‘_id’).addClass(‘active’).siblings().removeClass(‘active’);
and I gave my li’s ids like this: Details
PI_newbie
May 7, 2014 at 6:49 am
Thank you it works! But now is the problem that the tabs are not changing, the contents are switching but not the tabs..
Seb Kay
May 6, 2014 at 2:43 pm
Nandu,
The best thing to do is just follow many, but varying and most of all different, types of jQuery tutorials. The best way to learn is by doing. Try creating something on your own and increase the jQuery functionality to a higher level every time you get better at writing it 🙂
Seb Kay
May 6, 2014 at 2:40 pm
PI_newbie and Shalini,
The best way to set up a button to go to next tab would be to change the line that says
$('.tabs .tab-links a')to$('.tabs .tab-links a, .button-class'), which should make it act like one of the tab links.Hope this helps!