Create a Fading Popup Modal with jQuery
- 5 min read
This tutorial is aimed at getting beginners familiar more advanced concepts like data attributes and, at times, there will be more “efficient” ways of doing things, like creating advanced functions and optimising the output. However, as this tutorial is aimed at helping beginners, I’ll be taking a more procedural approach than some people might take. There is no right or wrong way here, there are simply more advanced and less advanced methods of getting the desired outcome.
Table of Contents
- Skip to the HTML
- Skip to the CSS
- Skip to the jQuery
If you get stuck at all please leave me a comment below with a description of the problem and a link to a JSFiddle showing your code in action. I’m here to help, no matter what the problem.
You might also like: How to Create a 12 Column Grid System with Sass
1.) Step 1: HTML
Pro-Tip: Place it in the Footer
If you’re running a PHP powered site, like a WordPress blog, then it’s a good idea to put the code for the popup itself in the footer include file. This way you can always be sure the popup will be included on every page.
Final HTML
<a class="btn" data-popup-open="popup-1" href="#">Open Popup #1</a>
<div class="popup" data-popup="popup-1">
<div class="popup-inner">
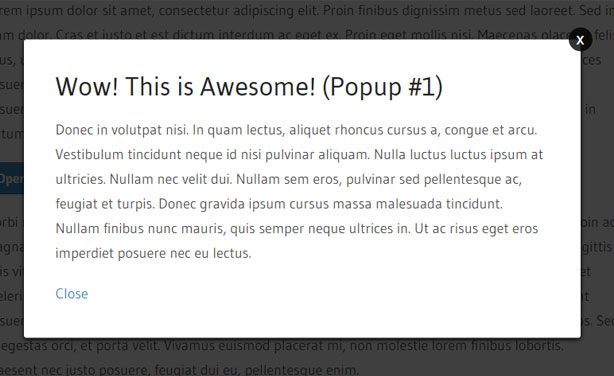
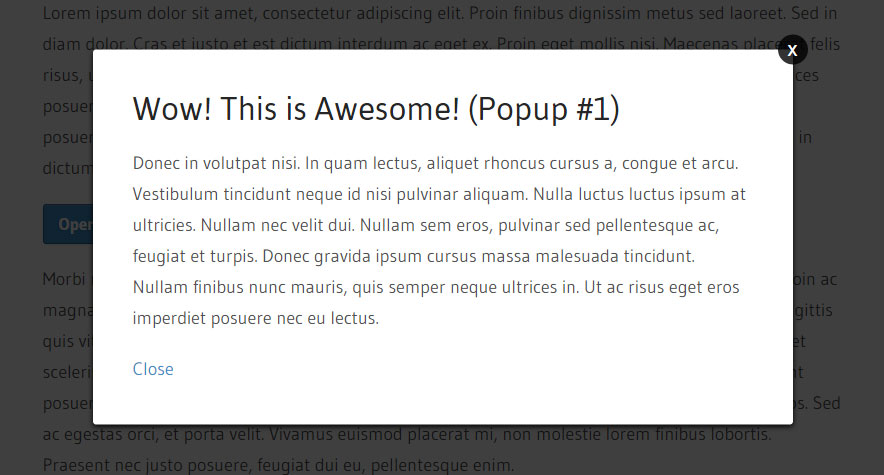
<h2>Wow! This is Awesome! (Popup #1)</h2>
<p>Donec in volutpat nisi. In quam lectus, aliquet rhoncus cursus a, congue et arcu. Vestibulum tincidunt neque id nisi pulvinar aliquam. Nulla luctus luctus ipsum at ultricies. Nullam nec velit dui. Nullam sem eros, pulvinar sed pellentesque ac, feugiat et turpis. Donec gravida ipsum cursus massa malesuada tincidunt. Nullam finibus nunc mauris, quis semper neque ultrices in. Ut ac risus eget eros imperdiet posuere nec eu lectus.</p>
<p><a data-popup-close="popup-1" href="#">Close</a></p>
<a class="popup-close" data-popup-close="popup-1" href="#">x</a>
</div>
</div>The HTML Explained
The structure of the popup is quite straightforward, so nothing to worry about there. We start off with a wrapper div and give it a class of popup. This is the black background around the popup but also what we’ll animate with jQuery.
You may notice those data attributes I’m using, for example data-popup="popup-1". The reason for using these is to make the code easier to use and maintain in the long run. Some people are advocates of using IDs in the same approach, however, this can become confusing as IDs are also commonly used for styling.
<div class="popup" data-popup="popup-1">

</div>
The open button also uses a data attribute of data-popup-open="popup-1", which you may notice is the same value as the popup itself. This is handy because it will allow us to dynamically open the popup with jQuery.
<a class="btn" data-popup-open="popup-1" href="#">Open Popup #1</a>To close the popup there’s a normal anchor link and a specially positioned anchor link with data-popup-close="popup-1" applied to them. The good thing about using a data attribute on both links is that it allows us to have a special close button in the upper right of the popup, but also use a normal link inside of the popup to close it as well.
<p data-popup-close="popup-3"><a href="#">Close</a></p>
<a class="popup-close" data-popup-close="popup-3" href="#">x</a>
2.) Step 2: CSS
Final CSS
/* Outer */
.popup {
	width:100%;
	height:100%;
	display:none;
	position:fixed;
	top:0px;
	left:0px;
	background:rgba(0,0,0,0.75);
}

/* Inner */
.popup-inner {
	max-width:700px;
	width:90%;
	padding:40px;
	position:absolute;
	top:50%;
	left:50%;
	-webkit-transform:translate(-50%, -50%);
	transform:translate(-50%, -50%);
	box-shadow:0px 2px 6px rgba(0,0,0,1);
	border-radius:3px;
	background:#fff;
}

/* Close Button */
.popup-close {
	width:30px;
	height:30px;
	padding-top:4px;
	display:inline-block;
	position:absolute;
	top:0px;
	right:0px;
	transition:ease 0.25s all;
	-webkit-transform:translate(50%, -50%);
	transform:translate(50%, -50%);
	border-radius:1000px;
	background:rgba(0,0,0,0.8);
	font-family:Arial, Sans-Serif;
	font-size:20px;
	text-align:center;
	line-height:100%;
	color:#fff;
}

.popup-close:hover {
	-webkit-transform:translate(50%, -50%) rotate(180deg);
	transform:translate(50%, -50%) rotate(180deg);
	background:rgba(0,0,0,1);
	text-decoration:none;
}
The CSS Explained
The popup wrapper is using RGBA colour values to enable transparency, something a basic #HEX code can’t do. It also has fixed positioning, which makes it stay centred if the page is scrolled.
/* Outer */
.popup {
	background:rgba(0,0,0,0.75);
}
The inner content area of the popup is absolutely positioned but also repositioned with transform. The absolute positioning moves the inner popup content left 50% and down 50%. The transform then moves it left -50% of its own width and down -50% of its own height. This then enables the inner popup to be exactly centred no matter what the size of the screen.
/* Inner */
.popup-inner {
	position:absolute;
	top:50%;
	left:50%;
	-webkit-transform:translate(-50%, -50%);
	transform:translate(-50%, -50%);
}
The close button actually has a lot more styling rules than you’d expect. The reason it has a fon-family and font-size added is to make the popup work better across different projects. I highly advise using an icon font for the close button. For a good example, click the newsletter subscribe button at the top of the sidebar on this site. There’s also a transition on the button, this comes into play when you hover.
/* Close Button */
.popup-close {
	transition:ease 0.25s all;
	-webkit-transform:translate(-50%, -50%);
	transform:translate(50%, -50%);
}
On hover, the button is spun around 180 degrees. If you put 360 degrees it will actually not look any different so 180 is what’s needed for the desired spinning effect.
.popup-close:hover {
	-webkit-transform:translate(50%, -50%) rotate(180deg);
	transform:translate(50%, -50%) rotate(180deg);
	background:rgba(0,0,0,1);
}
That’s it for the CSS. If you’ve got any question on what we covered so far, please leave me a comment below.
3.) Step 3: jQuery
Final jQuery
$(function() {
	//----- OPEN
	$('[data-popup-open]').on('click', function(e) {
		var targeted_popup_class = jQuery(this).attr('data-popup-open');
		$('[data-popup="' + targeted_popup_class + '"]').fadeIn(350);

		e.preventDefault();
	});

	//----- CLOSE
	$('[data-popup-close]').on('click', function(e) {
		var targeted_popup_class = jQuery(this).attr('data-popup-close');
		$('[data-popup="' + targeted_popup_class + '"]').fadeOut(350);

		e.preventDefault();
	});
});
The jQuery Explained
Do you remember those data attributes from the HTML? This is where they come into play. We first set up a click event on any of the open buttons and stop the default behaviour, which in this case, would be to follow the link. If we don’t use e.preventDefault(); to stop the default behaviour, a # will be added to the URL in the address bar.
$('[data-popup-open]').on('click', function(e) {
	e.preventDefault();
});
The next step is to grab the value from the attribute and save that information to a variable. The value saved will be whatever has been added to that buttons attribute data-popup-open. In our case, the output will be popup-1.
var targeted_popup_class = jQuery(this).attr('data-popup-open');Now comes the fun part, fading in the popup. The code below might look pretty scary but really, it’s quite simple. All it says is “find the popup with a data-popup value of popup-1 and fade it in for 350 milliseconds“. Also, because we’re using a variable, it saves us from having to repeat the open functionality for each popup we create, as it’s dynamically found and used.
$('[data-popup="' + targeted_popup_class + '"]').fadeIn(350);Closing the Popup
Closing the popup is actually just a reverse of opening it. Instead of looking for the value of the open button we’re looking for the value of the close button. We’re also fading out instead of fading in.
In Conclusion
Custom popup modals can be incredibly powerful, but also far more annoying if used incorrectly. When implementing your popup modal please don’t have it to autoload. This is a big problem as it will cause people to never return, even if you remove the popup because there only thought of your site and brand is an annoying popup the second they open up some of your content.
Help and support: If you have questions and/or need help with any code, please leave a comment below with a link to a JSFiddle showing your code in action.
You might also like: Tooltips in HTML and CSS.
Kha
December 28, 2020 at 7:38 pm
Hi, excellent tutorial, thank you. I know you recommend against autoload but I need it to load when page load instead of “click” to open. I only need it for a short time during the holidays, to pop up with a message and picture to wish everyone a Happy Holiday. I tried to change the “click” to “load” but it did now work. How do I do that? Everything else is perfect to what I need it for. Thanks in advance.
Quang Vinh
November 16, 2018 at 4:02 am
Dear sir,
Thank you for the code, and I have a question.
How to keep popup open after postback (for asp.NET)
Thanks
Chris
July 12, 2018 at 4:05 pm
Curious, can you set it to tab so keyboard accessible? or close with ESC key?
Will the focus be given so a screen reader notifies the modal? Aria?
Nupur Ahuja
July 4, 2018 at 10:55 am
thank you
Rui
May 18, 2018 at 6:07 pm
Thank you for the code! I have one question though, it seems not work properly in mobile. I have tried to add “overflow:auto/scroll”, but still not able to scroll the window.
Does anyone have ideas how to fix this issue?
Rosalynn
May 6, 2018 at 9:16 pm
I’m having trouble getting the popup to open after a page navigation. Unless the page is directly refreshed, the popup won’t open. Any idea on how to fix that?
Tom
April 13, 2018 at 1:09 pm
Hello,
Great tutorial, thanks a lot! How can I make this popup come up when the page load?
So no button needed, just an automatic popup.
Thank you in advance!
Tom
Punith C S
March 17, 2018 at 10:54 am
How to disable background scroll?
Tom
March 15, 2018 at 10:51 pm
Hi, very nice work! But what if the content is bigger than the popup? How can i get scroll bars?
Rosalynn
May 6, 2018 at 9:15 pm
You just need to set the popup content to overflow: scroll