How To Add Likes to Posts in WordPress (Without a Plugin)
- 5 min read

There are countless plugins out there to add likes to posts in WordPress, however, a lot of them are bloated with features you’ll never use. The problem is that all the extra code, especially the JavaScript that gets loaded on every page, will slow your site down.
In the following tutorial, I’m going to show you how to make your very own “like counter” for your posts with HTML, CSS and PHP. Learn how to add WordPress post likes/dislikes without plugin.
If you’d like an AJAX version (where the page doesn’t have to reload), please leave me a comment below!
Quick Links
1.) The HTML
To start off let’s build the HTML structure of the two like buttons. In my example, I’m editing the Twenty Sixteen default WordPress theme. If you’re following along but using your own theme, all of the below still applies, you’ll just have the tweak your CSS in places.
<ul class="likes">
	<li class="likes__item likes__item--like">
		<a href="#">
			Like (0)
		</a>
	</li>
	<li class="likes__item likes__item--dislike">
		<a href="#">
			Dislike (0)
		</a>
	</li>
</ul>
What we’ll need to do in order for the buttons to show up is add them before the post content, using the filterthe_content.
<?php
	function ip_post_likes($content) {
		// Check if single post
		if(is_singular('post')) {
			// Start output buffering
			ob_start();

			?>
				<ul class="likes">
					<li class="likes__item likes__item--like">
						<a href="#">
							Like (0)
						</a>
					</li>
					<li class="likes__item likes__item--dislike">
						<a href="#">
							Dislike (0>)
						</a>
					</li>
				</ul>
			<?php

			// End output buffering and add output to variable
			$output = ob_get_clean();

			// Concatenate our buttons with the post content
			return $output . $content;
		}else {
			// Return untouched post content for pages and other post types
			return $content;
		}
	}

	add_filter('the_content', 'ip_post_likes');
?>
The above code might be a bit scary, so let’s break it down.
First, we create a function called ip_post_likes() which accepts one parameter of $content.
function ip_post_likes($content) {

}
This function checks if we’re viewing a post. If we didn’t run the check, this would show up anywhere the_content(); is called, like a page for example.
if(is_singular('post')) {

}
Next, we use something called output buffering. All this does is say “assign anything inside the buffer to a variable”. We start the buffer with ob_start(); and end it with ob_get_clean();, which also assigns the output to the variable. In this case, the variable is called $output.
<?php ob_start(); ?>
<p>
	Some HTML content can go here!
</p>
<?php $output = ob_get_clean(); ?>
Then we concatenate our $output and $content variables. When using the filter the_content, the variable$content is just the post content that will be output to the page. By concatenating them our like buttons will be placed right before any of the post content.
return $output . $content;The last thing we do for our function is add an else statement to say “if this isn’t a post, just output the content normally”. If we didn’t do this all other post types would have no content.
if(is_singular('post')) {
	return $output . $content;
}else {
	return $content;
}
We then make this work by attaching our function to the filter the_content.
add_filter('the_content', 'ip_post_likes');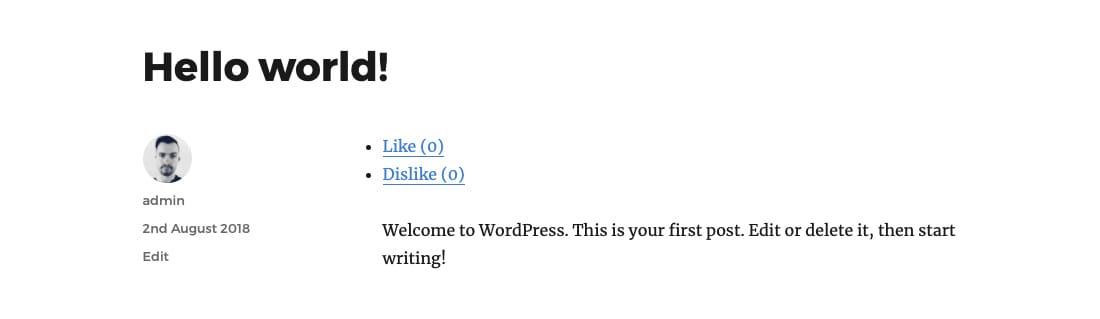
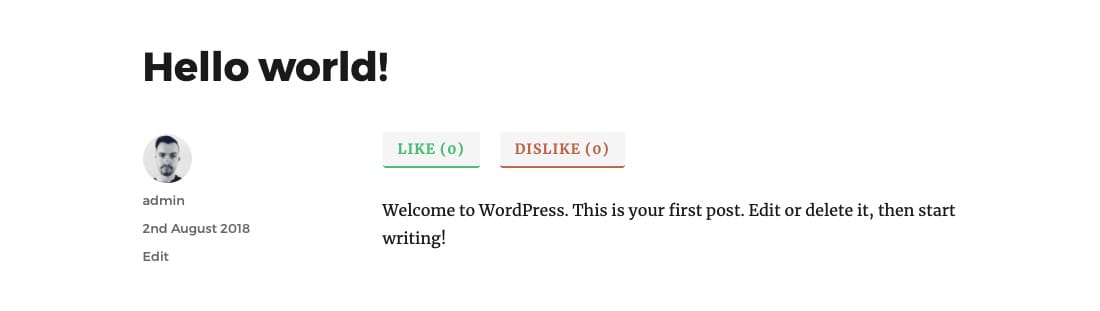
2.) The CSS
The CSS for the buttons is quite basic as there’s not a lot of HTML to style in the first place. Here’s what the finished CSS looks like:
.likes {
	display: flex;
}

.likes__item {
	list-style: none;
}

.likes__item:not(:last-child) {
	margin-right: 20px;
}

.likes__item a {
	padding: 10px 15px;
	display: inline-block;
	border-bottom: 2px solid;
	border-radius: 3px;
	box-shadow: none;
	background: #f5f5f5;
	font-size: 14px;
	font-weight: bold;
	text-transform: uppercase;
	letter-spacing: 1px;
	line-height: 100%;
}

.likes__item a:hover {
	color: #fff;
}

.likes__item--like a {
	border-bottom-color: #47ba72;
	color: #47ba72;
}

.likes__item--dislike a {
	border-bottom-color: #ba6547;
	color: #ba6547;
}

.likes__item--like a:hover {
	background: #47ba72;
}

.likes__item--dislike a:hover {
	background: #ba6547;
}
The only thing that might stump you if you’re new to CSS is how I apply margins to list items.
The reason I use :not(:last-child) is that it’ll add that margin to every element, except the last one. This is helpful and more useful than using left margin if your list starts to wrap at a certain breakpoint.
.likes__item:not(:last-child) {
	margin-right: 20px;
}
3.) The PHP
Now for the meat of this tutorial, the PHP code that makes the magic happen!
First, we need to create a function to get the likes and dislikes from the post. We won’t be using the function right away, but we’ll need it in the next few bits of PHP we write.
The function is quite simple, all it does it get the current like or dislike count from the database. If there are no likes or dislikes to be found, we can assume the number is 0.
You’ll see the function takes an argument of $type. All this means is the name of the post meta field we’ll be creating momentarily. The function defaults to finding “likes”.
function ip_get_like_count($type = 'likes') {
	$current_count = get_post_meta(get_the_id(), $type, true);

	return ($current_count ? $current_count : 0);
}
The next part of the PHP we’ve covered in the HTML section, but here there’s a difference – it’s using the function ip_get_like_count() we just created. Right away it should show the fallback of 0.
<?php
	function ip_post_likes($content) {
		// Check if single post
		if(is_singular('post')) {
			ob_start();

			?>
				<ul class="likes">
					<li class="likes__item likes__item--like">
						<a href="<?php echo add_query_arg('post_action', 'like'); ?>">
							Like (<?php echo ip_get_like_count('likes') ?>)
						</a>
					</li>
					<li class="likes__item likes__item--dislike">
						<a href="<?php echo add_query_arg('post_action', 'dislike'); ?>">
							Dislike (<?php echo ip_get_like_count('dislikes') ?>)
						</a>
					</li>
				</ul>
			<?php

			$output = ob_get_clean();

			return $output . $content;
		}else {
			return $content;
		}
	}

	add_filter('the_content', 'ip_post_likes');
?>
Other than our functionip_get_like_count(), we’re also using the functionadd_query_arg(). This just takes the current URL and adds a query string on the end. For example, on my localhost setup where WordPress is installed in the directory/wordpress/, the URL would be /wordpress/2018/08/02/hello-world/?post_action=like.
<?php echo add_query_arg('post_action', 'like'); ?>The next function we need to create is the one to actually process the like by updating the post meta.
function ip_process_like() {
	$processed_like = false;
	$redirect       = false;

	// Check if like or dislike
	if(is_singular('post')) {
		if(isset($_GET['post_action'])) {
			if($_GET['post_action'] == 'like') {
				// Like
				$like_count = get_post_meta(get_the_id(), 'likes', true);

				if($like_count) {
					$like_count = $like_count + 1;
				}else {
					$like_count = 1;
				}

				$processed_like = update_post_meta(get_the_id(), 'likes', $like_count);
			}elseif($_GET['post_action'] == 'dislike') {
				// Dislike
				$dislike_count = get_post_meta(get_the_id(), 'dislikes', true);

				if($dislike_count) {
					$dislike_count = $dislike_count + 1;
				}else {
					$dislike_count = 1;
				}

				$processed_like = update_post_meta(get_the_id(), 'dislikes', $dislike_count);
			}

			if($processed_like) {
				$redirect = get_the_permalink();
			}
		}
	}

	// Redirect
	if($redirect) {
		wp_redirect($redirect);
		die;
	}
}

add_action('template_redirect', 'ip_process_like');
I’m sure that looks a bit much to take in all at once, so let’s break it down.
We first create two variables, $processed_like and $redirect. By setting them to false at the very top of the function, we can rely on them being false until we actually do something to make them true.
function ip_process_like() {
	$processed_like = false;
	$redirect       = false;
}
Next, we check if the current screen is a single post. If it is we check the variable$_GET['post_action'] is set. If that’s true we can then see if the user is trying to do a “like” or a “dislike”.
// Check if like or dislike
if(is_singular('post')) {
if(isset($_GET['post_action'])) {
if($_GET['post_action'] == 'like') {
// Like
}elseif($_GET['post_action'] == 'dislike') {
// Dislike
}
}
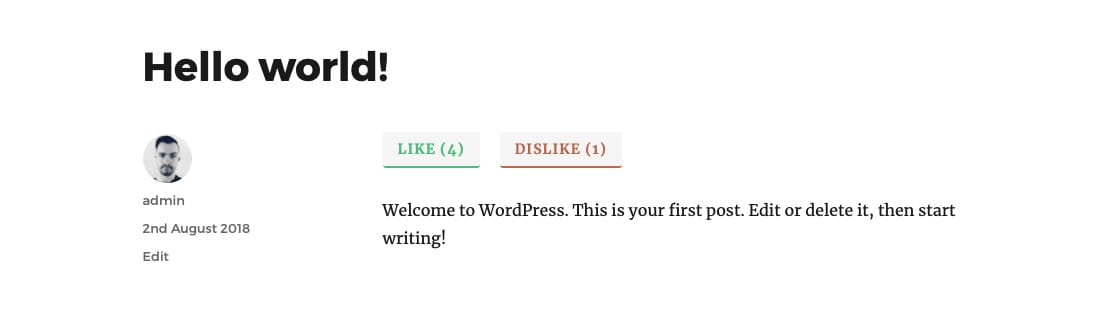
}After that we write some basic code in each part of the if/else statement that says “get the current post meta likes, if there are some, add 1, if not, start at 1”. The same logic applies to both parts, we just change out “likes” for “dislikes” in the else statement.
// Like
$like_count = get_post_meta(get_the_id(), 'likes', true);

if($like_count) {
	$like_count = $like_count + 1;
}else {
	$like_count = 1;
}

$processed_like = update_post_meta(get_the_id(), 'likes', $like_count);
We also update the meta using the functionupdate_post_meta(). I usually prefer using this over add_post_meta() because, if there’s no meta in place, update_post_meta() will add it anyway.
Now we check if $processed_like is true. If the post meta updated, then it will be true, because update_post_meta() returns true on success. If it is true, we set the current permalink as the redirect.
The reason we have to do a redirect is that if we didn’t and just loaded the page with ?post_action=like still in the URL, if the user copied that URL or simply refreshed the page, it would add another like.
if($processed_like) {
	$redirect = get_the_permalink();
}
Lastly, we actually run the redirect, which only happens if the variable$redirect is true.
// Redirect
if($redirect) {
	wp_redirect($redirect);
	die;
}
To make this code actually work we’re running it with the actiontemplate_redirect, which runs before WordPress chooses the template for the current screen.
add_action('template_redirect', 'ip_process_like');4.) Final Code
Thanks for following along with the tutorial and I hope it’s been helpful to you!
If you’ve got any questions about the above, please leave a comment below and I’ll get back you in anyway I can.
PHP
<?php
	//---- Add buttons to top of post content
	function ip_post_likes($content) {
		// Check if single post
		if(is_singular('post')) {
			ob_start();

			?>
				<ul class="likes">
					<li class="likes__item likes__item--like">
						<a href="<?php echo add_query_arg('post_action', 'like'); ?>">
							Like (<?php echo ip_get_like_count('likes') ?>)
						</a>
					</li>
					<li class="likes__item likes__item--dislike">
						<a href="<?php echo add_query_arg('post_action', 'dislike'); ?>">
							Dislike (<?php echo ip_get_like_count('dislikes') ?>)
						</a>
					</li>
				</ul>
			<?php

			$output = ob_get_clean();

			return $output . $content;
		}else {
			return $content;
		}
	}

	add_filter('the_content', 'ip_post_likes');

	//---- Get like or dislike count
	function ip_get_like_count($type = 'likes') {
		$current_count = get_post_meta(get_the_id(), $type, true);

		return ($current_count ? $current_count : 0);
	}

	//---- Process like or dislike
	function ip_process_like() {
		$processed_like = false;
		$redirect       = false;

		// Check if like or dislike
		if(is_singular('post')) {
			if(isset($_GET['post_action'])) {
				if($_GET['post_action'] == 'like') {
					// Like
					$like_count = get_post_meta(get_the_id(), 'likes', true);

					if($like_count) {
						$like_count = $like_count + 1;
					}else {
						$like_count = 1;
					}

					$processed_like = update_post_meta(get_the_id(), 'likes', $like_count);
				}elseif($_GET['post_action'] == 'dislike') {
					// Dislike
					$dislike_count = get_post_meta(get_the_id(), 'dislikes', true);

					if($dislike_count) {
						$dislike_count = $dislike_count + 1;
					}else {
						$dislike_count = 1;
					}

					$processed_like = update_post_meta(get_the_id(), 'dislikes', $dislike_count);
				}

				if($processed_like) {
					$redirect = get_the_permalink();
				}
			}
		}

		// Redirect
		if($redirect) {
			wp_redirect($redirect);
			die;
		}
	}

	add_action('template_redirect', 'ip_process_like');
?>
CSS
.likes {
	display: flex;
}

.likes__item {
	list-style: none;
}

.likes__item:not(:last-child) {
	margin-right: 20px;
}

.likes__item a {
	padding: 10px 15px;
	display: inline-block;
	border-bottom: 2px solid;
	border-radius: 3px;
	box-shadow: none;
	background: #f5f5f5;
	font-size: 14px;
	font-weight: bold;
	text-transform: uppercase;
	letter-spacing: 1px;
	line-height: 100%;
}

.likes__item a:hover {
	color: #fff;
}

.likes__item--like a {
	border-bottom-color: #47ba72;
	color: #47ba72;
}

.likes__item--dislike a {
	border-bottom-color: #ba6547;
	color: #ba6547;
}

.likes__item--like a:hover {
	background: #47ba72;
}

.likes__item--dislike a:hover {
	background: #ba6547;
}
Preview
Lester
May 8, 2022 at 12:55 am
Hi, i like the code. But can you show the most like post base on the like button thanks…
sajad azan
December 7, 2021 at 12:29 pm
hey, thanks, I have a problem to use this code. when I duplicate a post, likes and dislikes do not become 0
sajad azan
December 7, 2021 at 12:28 pm
hey, thanks, I have a problem to use this code.
when I duplicate a post, likes and dislikes do not become 0
Caucasian
September 18, 2021 at 10:13 pm
Hi,
Thanks for your article. I have a question.
I don’t want to add for the whole post. What should I do to add a like button after each item/paragraph in the article? Can you help with this?
Tertia
March 15, 2021 at 3:02 am
Oh thank god, an article that actually gives code and not just the usual shitty “want this functionality? download a plugin :-)”
chris
October 14, 2020 at 1:20 pm
Nice snippet.
Would it be possible if I modify this to just have a single button, where you can click for like and unclick to retract like? I am wanting like a heart button.
Haripal Reddy
December 6, 2019 at 10:55 am
Your code works fine. But it need to be unique per 1 ip address. When i click 2 likes the number increases to 2 but it should be 1 per one ip. How can we do that.
Pedro
May 6, 2020 at 4:48 pm
Same in here. Did you solve that problem easily?
Thanks!
Fernando Giroto
August 26, 2019 at 12:05 pm
Great article!
I Followed and managed to do on my site. My question is if I could do it without having to refresh the page. Thank you
Aaryan Sharma
August 6, 2019 at 12:08 pm
Thank you so much for this, i tweaked the php code so that the like/dislike buttom come at the bottom of the post but that was very easy. Changed the css to my liking and it works perfectly. I usually don’t comment but you deserve it! Great work.
Phuong
July 14, 2019 at 1:03 pm
Thank for your sharing. May i have your AJAX version?
Fernando Giroto
August 22, 2019 at 3:00 pm
Any awnser? Thaaanks!
Benila
April 17, 2019 at 8:30 am
Hi Thanks for uploading the above code. I used this code but the likes and dislikes buttons are not working. It’s shows exactly like your picture but clicking not counting and saving. I am using DIVI theme. Could you please help me to fix this.